Your solar system looked great at installation, so why is your monthly production 18% lower than it was two years ago? The answer is almost never one dramatic failure. It is usually a slow accumulation of small, invisible problems that no homeowner notices until the utility bill tells the story. A professional solar panel inspection exists precisely to catch those problems before they become expensive repairs or safety hazards. If you are in Delaware, Maryland, Pennsylvania, Virginia, New Jersey, or Washington, D.C., and your system has not been looked at by a licensed technician in the past year, you are likely leaving performance on the table.
Table of Contents
- What Is a Solar Panel Inspection?
- Quick Takeaways
- Step-by-Step: What Happens During the Inspection
- Infrared Thermography and IV Curve Testing
- Battery Storage and EV Charger Checks
- Comparison: DIY vs. Basic Inspection vs. Full Diagnostics
- What Inspectors Actually Find: Common Problems
- How Often Should You Schedule a Solar Panel Inspection?
- What to Expect in Your Inspection Report
- Frequently Asked Questions
- References
What Is a Solar Panel Inspection?
A solar panel inspection is a professional evaluation of your entire solar energy system. It is not just a glance at the panels from the driveway. A trained technician examines the panels themselves, the inverter, all wiring and electrical connections, the mounting hardware, and the system's production data. The goal is to assess safety, confirm performance, and catch faults that have no visible symptoms.
Unlike routine cleaning, which only removes surface debris, a real inspection identifies hidden issues such as wiring faults, inverter malfunctions, and mounting instability that can silently erode your energy output. For homeowners in the Mid-Atlantic region, where seasonal weather swings from humid summers to icy winters, these stresses compound quickly on rooftop equipment.
Pro tip: Do not rely on your monitoring app alone. Monitoring software flags dramatic drops, but a panel losing 8-12% of its output due to microcracks or a failing bypass diode will often look like a normal seasonal variation until a technician tests it directly.
Quick Takeaways
Key Insight | Explanation |
|---|---|
Inspections cover far more than panels | A complete solar system diagnostic includes the inverter, wiring, combiner boxes, mounting hardware, safety disconnects, and battery storage if present. |
Annual inspections are the standard | Most solar systems should be professionally inspected once a year to identify issues early and maintain peak performance. |
Infrared cameras find faults invisible to the eye | Thermal imaging identifies hotspots, bypass diode failures, cracked cells, and loose connections without shutting the system down. |
IV curve testing reveals hidden underperformers | This electrical test shows exactly how each panel performs under varying light conditions, surfacing weak spots before they cause real production losses. |
Battery storage systems need their own check | State-of-charge, wiring integrity, and thermal management must be verified separately from the panel array. |
Electrical code compliance matters long-term | Combiner box labels, breaker sizing, and disconnect accessibility must meet NEC requirements, not just at install but throughout the system's life. |
After severe weather, schedule an inspection immediately | Hail, heavy snow loads, and high winds can loosen mounts, crack cells, and shift wiring in ways that are not visible from the ground. |
Step-by-Step: What Happens During the Inspection
A professional solar system diagnostic follows a defined sequence. The exact order varies by technician, but the core steps are consistent across qualified inspectors. Here is what a thorough inspection actually involves, from the moment the technician arrives to the moment you receive your report.
Visual Inspection of Solar Panels
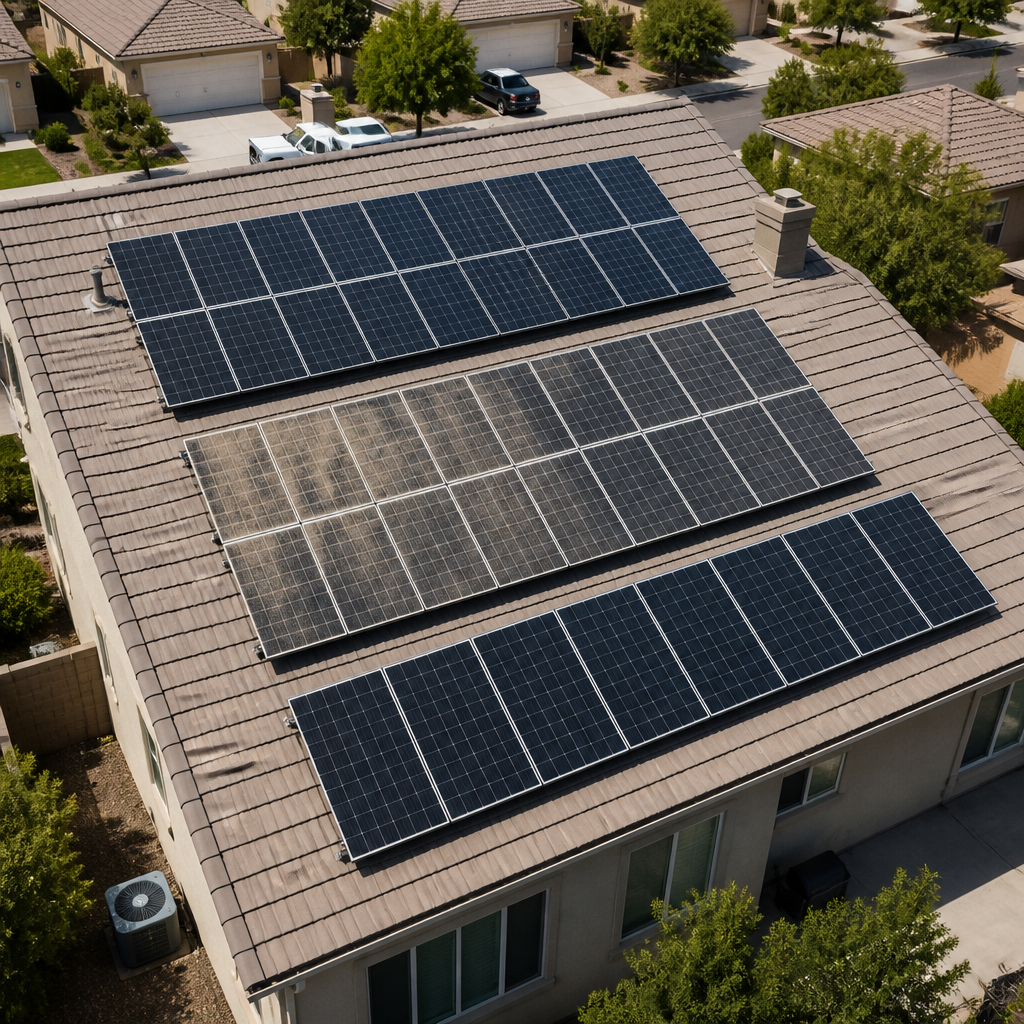
The technician starts on the roof. Every panel is examined individually for cracks, discoloration, delamination, and physical damage from debris or hail. Signs of water intrusion around frames and junction boxes are also flagged. Even small surface cracks matter because they create hotspots that accelerate degradation in the affected cell strings.
Roof and Mounting System Inspection
After evaluating the panels, the technician checks the racking hardware. Bolts loosen over years of thermal expansion and contraction. Flashings can shift, creating slow water infiltration paths into the roof deck. A mounting system that looked solid at installation can develop play over three to five years, especially on older asphalt shingle roofs common in Maryland and Pennsylvania.
Wiring and Electrical Connection Review
The inspection moves to the conduit runs, junction boxes, and combiner boxes. Wiring in combiner boxes is checked to confirm connections match labeling. Conductor size and voltage ratings are verified against the inverter specifications. Breaker sizing at all disconnect points is confirmed, and the accessibility of system disconnecting switches is assessed for code compliance. Every solar system has specific labeling requirements under electrical codes, and those labels degrade or go missing over time.
Inverter Inspection and Testing
The inverter converts DC power from your panels into AC power your home uses. It is the most complex single component in the system. Technicians review performance data, check for stored error codes, verify the unit is operating within expected parameters, and confirm that safety shutoff systems are functioning correctly. An inverter showing no visible problems can still be clipping production or throwing intermittent faults that only appear in the error log.
Performance and Production Analysis
The technician compares actual production data against expected output given the system's size, panel orientation, and local weather history. A sudden or sustained drop in output that the homeowner has not noticed on their monitoring app is often caught here. Do not ignore a persistent deviation from expected production. It could be as simple as shading from a tree that grew taller, or as serious as a failed string that has been dragging the whole array down for months.
Safety Equipment Inspection
Rapid shutdown devices, arc fault protection, and grounding connections are all verified. These are not optional features. They exist to protect emergency responders and your household if there is a fire or electrical fault. Systems installed several years ago may not have components that meet current code and may need upgrades as part of the inspection findings.
Infrared Thermography and IV Curve Testing
Two diagnostic tools separate a basic visual inspection from a true professional solar service: infrared thermography and IV curve testing. Both provide data that no visual inspection can replicate.
Infrared Thermography
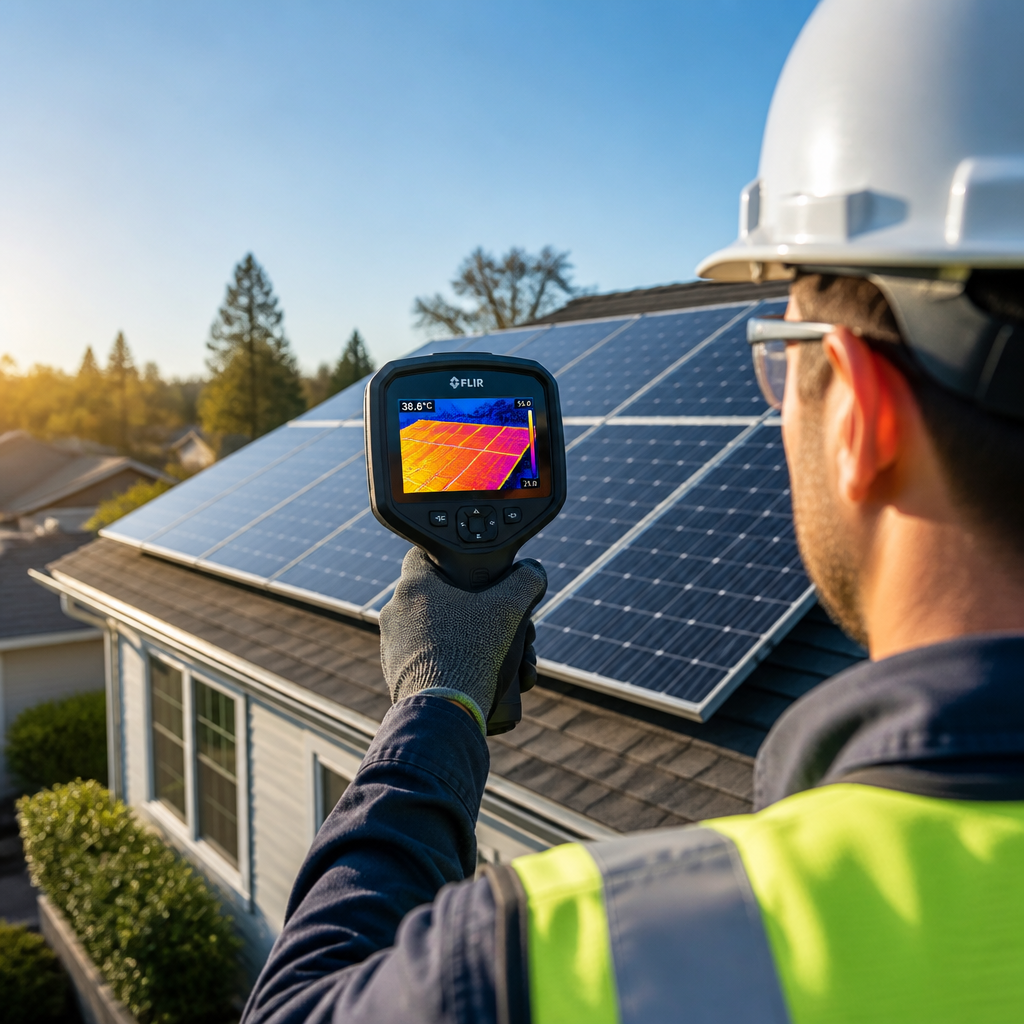
Thermal imaging cameras capture heat patterns across every panel in the array. Elevated temperatures point to specific failure modes: a hotspot on a single cell indicates a bypass diode failure or a cracked cell. A full panel running hotter than its neighbors suggests soiling, shading, or a connection problem. Thermal imaging works without shutting the system down and can scan large arrays quickly. According to industry standards, a temperature differential of more than 10 degrees Celsius on a single panel signals a fault that warrants immediate investigation.
Infrared inspections are most accurate under specific conditions. Irradiance needs to be strong enough to generate meaningful heat differentials, and wind speeds need to be low enough that convective cooling does not mask temperature anomalies. In the Mid-Atlantic, early-to-mid morning inspections on clear summer days tend to produce the clearest thermal data.
Pro tip: If a solar service company offers an inspection but does not mention infrared scanning, ask directly whether it is included. A visual-only inspection will miss hotspots, cracked cells, and failing bypass diodes that are actively degrading your production.
IV Curve Testing
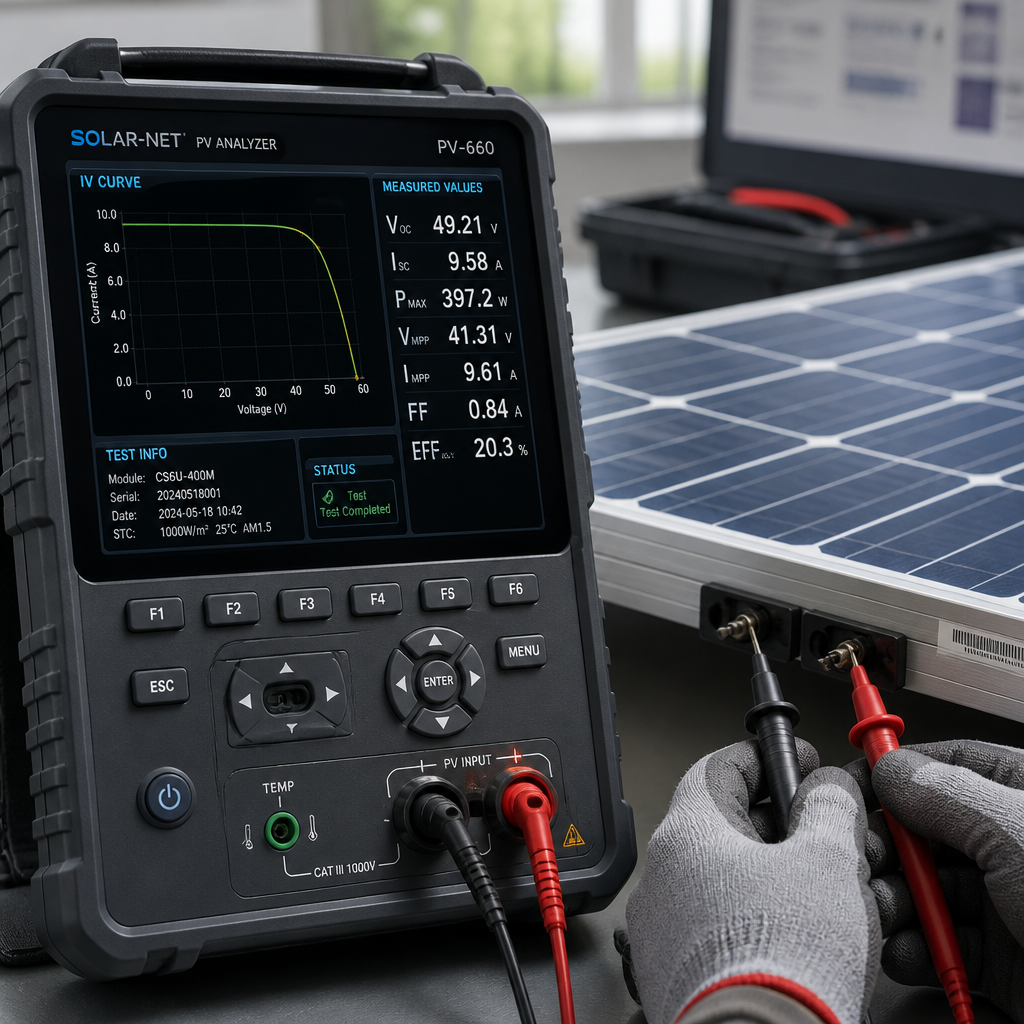
An IV curve test measures how each panel responds to varying levels of irradiance. It generates a current-voltage curve that reveals exactly where a panel is underperforming relative to its rated specifications. Hidden defects, including partial shading effects, internal cell damage, and connection resistance, show up as distortions in the curve. This test catches problems that produce no visible symptoms and no dramatic monitoring alert, but that have been costing you output for months.
The IV curve test shows how panels perform when there is a lot of sun and when there is not. If something is wrong, it shows up quickly. It is a way to find problems that are not obvious before they become real performance problems.
Battery Storage and EV Charger Checks
Homes with battery storage systems or EV chargers need those components evaluated as part of a comprehensive solar system diagnostic, not as an afterthought. A battery that is not charging to its rated capacity, or one with a developing cell imbalance, will not protect you during an outage the way you expect it to.
Battery Storage Evaluation
The technician checks state of charge, verifies wiring integrity between the battery and inverter, and confirms that thermal management systems are operating correctly. Battery cells degrade over charge cycles, and a system that was installed three years ago may have measurably less usable capacity than it did on day one. Knowing the actual current capacity is important for homeowners making decisions about backup load coverage.
EV Charger and Panel Capacity Review
Adding an EV charger to a home that also has a solar system raises real electrical panel load questions. A thorough inspection will flag whether the existing electrical service panel has the capacity to handle the combined loads, and whether the solar system's production profile is well-matched to EV charging demand. For homeowners in Delaware, Maryland, Virginia, and the D.C. area who are adding EVs to their household, this review is worth doing before the charger is installed, not after.
Comparison: DIY vs. Basic Inspection vs. Full Diagnostics
Inspection Type | What It Covers | What It Misses |
|---|---|---|
DIY Visual Check | Obvious surface damage, debris accumulation, visible wiring issues at ground level | Microcracks, hotspots, inverter error codes, connection resistance, mounting hardware torque, safety code compliance |
Basic Professional Inspection | Visual panel review, inverter check, wiring walk-through, basic production data review | Subsurface cell defects, bypass diode failures, IV curve deviations, battery storage state of health |
Full Professional Solar Diagnostics | All of the above plus infrared thermography, IV curve testing, battery state-of-health assessment, NEC compliance review, and written repair recommendations | Very little. This is the standard that a licensed electrical contractor with solar service specialization should deliver. |
The difference between a basic inspection and full diagnostics is not trivial. A technician who only walks the roof and glances at the inverter display is not performing a diagnostic. They are performing a visual survey. For a system representing a $15,000 to $30,000 investment, a surface-level check is not sufficient.
What Inspectors Actually Find: Common Problems
After thousands of inspections across the industry, certain findings come up repeatedly. These are not edge cases. They are the predictable result of panels operating through weather, time, and load cycles without professional attention.
Common findings include cracked or chipped panels caused by hail or falling debris, loose or corroded mounting hardware, wiring faults including exposed or improperly rated conductors, inverter issues affecting energy conversion efficiency, shading from vegetation growth that was not a factor at installation, delamination at panel edges, and roof damage from installation errors that only becomes apparent years later.
One finding that surprises many homeowners is panel misalignment. Panels can shift on their racking over time, particularly on roofs that experience significant thermal movement. Even a modest tilt change affects how much direct irradiance each panel receives during peak production hours.
In the Mid-Atlantic region specifically, the freeze-thaw cycle that runs from November through March puts particular stress on roof penetrations and mounting hardware. Inspections in early spring, after winter has done its work, tend to surface more mounting and flashing issues than inspections at any other time of year.
How Often Should You Schedule a Solar Panel Inspection?
Most solar systems should be professionally inspected at least once a year. Systems in their first year after installation benefit from inspections every three to six months to catch any installation-related issues before they develop into larger problems. After that initial period, an annual inspection is the right cadence for most residential systems.
Beyond the annual schedule, several events should trigger an immediate inspection regardless of when the last one occurred. These include any severe storm involving hail or high winds, a significant and unexplained drop in monitored production, a roof repair or replacement on a home with solar panels, and any time you are buying or selling a home that has an existing solar system installed. A solar system that was not inspected as part of a home sale is a liability the new owner inherits without knowing it.
Compared to large national solar companies, a licensed local electrical contractor specializing in solar service diagnostics and repairs can respond faster to post-storm inspections and is not limited to inspecting only the systems they originally installed.
What to Expect in Your Inspection Report
A professional solar system diagnostic should produce a written report, not a verbal summary at the curb. The report should document the condition of every major component, list any identified defects or code compliance issues, and include a prioritized set of repair recommendations with enough specificity that a homeowner understands what is needed and why.
The report should distinguish between immediate safety concerns, performance issues that are costing you production now, and items to monitor. That distinction matters because not every finding requires immediate action, but every finding should be documented so you can track system health over time.
If your installer, or any company you hire for an inspection, cannot produce a written report with those elements, that is a signal to look for a more thorough provider. A professional solar service engagement leaves you with documentation, not just reassurance.
Frequently Asked Questions
How long does a professional solar panel inspection take?
For a typical residential system of 20 to 30 panels, a thorough inspection including infrared scanning and performance analysis takes two to four hours. Larger arrays, systems with battery storage, or systems with significant access challenges may take longer. An inspection that takes 30 minutes is not a full diagnostic.
Can a solar panel inspection void my equipment warranty?
No, having a licensed professional inspect your system does not void manufacturer warranties. In fact, skipping regular maintenance and inspections is far more likely to create warranty claim complications if you experience a component failure. Manufacturers expect systems to be maintained, and documented inspections support warranty claims rather than undermining them.
What should I do to prepare for a solar inspection?
Clear access to your electrical panel, inverter, and any battery storage equipment before the technician arrives. Have your monitoring app or inverter login credentials ready so the technician can review historical production data. If you have noticed any specific issues, such as error codes on your inverter display or unusual sounds from the equipment, write those down. That context helps the technician prioritize the diagnostic sequence.
Is a solar panel inspection the same as solar system diagnostics?
They overlap but are not identical. A solar panel inspection often refers to the physical evaluation of the panels and associated hardware. Solar system diagnostics is a broader term that includes the panel inspection plus electrical testing, inverter analysis, performance data review, and battery storage evaluation if applicable. A complete professional service engagement should deliver both.
Do I need a solar inspection if my monitoring system shows normal output?
Yes. Monitoring systems measure total array output, not individual panel health. A failing panel can be masked by strong output from neighboring panels, especially in systems without panel-level monitoring. Wiring degradation, mounting hardware movement, and early inverter issues often develop without triggering monitoring alerts. Professional inspections find problems that production data alone cannot reveal.
Who is qualified to perform a professional solar panel inspection?
A qualified inspector should be a licensed electrical contractor with demonstrated solar service experience. NABCEP certification (North American Board of Certified Energy Practitioners) is a recognized credential in the solar industry. The inspector should carry specialized equipment including thermal imaging cameras and IV curve testing tools, not just a ladder and a multimeter.
Have you had a professional solar inspection in the past two years? Share what the technician found and whether it changed how you think about maintaining your system.
References
Solar system inspection checklist covering panels, inverter, wiring, and battery storage components
What happens step-by-step during a professional solar panel inspection for homeowners
How infrared thermography is used to detect solar panel faults and performance loss
Overview of professional solar system inspection services and what they assess